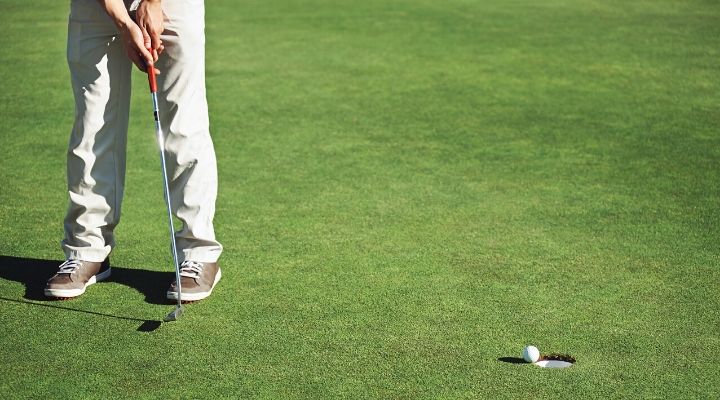
The golf hole is 4.25” wide.
The golf ball is only 1.68” wide.
What that clearly shows is that you don’t need to be perfect to sink putts.
With that much of a margin of error, even a slight miss left or right still has a good chance of going in the hole.
That’s the good news and should be cause for a little optimism.
Taking some time to learn how to putt in golf can make a huge difference in your overall score.
With the average number of putts taken in a round of golf consuming around 40% of all the strokes you take, it’s easy to see how much of an impact you can make on your scorecard by getting just a little better on the greens.
For a player that shoots around 90, for instance, just a 10% improvement in putting could bring you down into the mid-80’s!
Where Do the Strokes Go?
For higher handicap golfers, some key statistics tell the tale:
(1) On long putts outside 30 feet, high handicappers will only manage to lag their putts to within about 8-9 feet of the hole on average.
(2) 20-handicappers will miss about 15% of their 3-foot putts, about 50% of their 5-foot putts, and about 80% of their 10-footers.
(3) 20-handicappers 3-putt nearly 20% of the time; 25-handicappers 3-putt almost 25% of the time.
So, what conclusions can you draw from these statistics?
In other words, what do these statistics tell high handicap golfers about where they’re losing strokes on the greens and where they need to improve?
In looking at these numbers, the implications are pretty clear.
High handicappers lose most of their putting strokes because they’re not as good as they could be in terms of distance control on long putts, and they’re not as good as they could be in holing out short putts under 5 feet.
Taken together, these two deficiencies are the perfect recipe for the dreaded 3-putt. That’s why high handicap golfers end up 3-putting on about 1 out of every 5 holes.
By not being able to get your first putt to within the “makeable” range (3-5 feet), and by too often missing the remaining short putts when you do manage to lag to this range, you’re needlessly costing yourself strokes.
Just by tidying up these two areas – better distance control and making more short putts -- you could save yourself as much as 5-10 strokes per round.

How to Putt in Golf (The Correct Way)
As with any golf skill with which you sometimes struggle, it’s often best to go back and look at the fundamentals to make sure that you’re conforming to all of the basic principles.
So let’s review the essentials of putting (sort of a “Putting 101” course) to see if you’re doing all of the right things in your setup, stance, and stroke, or if perhaps you’ve unknowingly drifted away over time from any of these key guidelines.
We’ll be taking a look at the following key elements of putting:
- How to hold a putter
- The different grip types
- Proper stance
- The putting motion
- Face angle at impact
- Distance control
1. How to Hold the Putter
When you hold your driver, fairway wood, or an iron, you’ve been taught to grip these clubs in the fingers of your hands, not in the palms.
If you were to grip those clubs in your palms, you’d restrict your ability to release the club properly and, more often than not, you’d deliver an open club face at impact, resulting in a slice.
With these full swings, there’s necessarily a good deal of face rotation of the club through and after impact, and holding the club in the fingers allows you to do that.
With the putter, however, face rotation of the putter is precisely what you want to avoid.
Unless your timing is perfect, excessive rotation of the face is one of the biggest factors in inconsistent putting.
To avoid having too much face rotation with the putter, you need to grip the club more in the palms, so that the shaft is running down the lifeline of your lead hand.
This enables you to limit the face rotation and to more easily stroke the ball with a face that’s square to your line.
With the shaft held more in the palms, you should then make sure that your hands are facing each other, with both thumbs placed on top of the putter’s grip.
2. The Different Grip Types
As long as you’re holding the club in your palms to limit face rotation, there are several optional ways to position your hands on the club.
All of them are acceptable ways to grip the putter and largely come down to a matter of personal preference.
A. Conventional Grip (Right Hand Low)
This is the most common grip type and is probably the one you were taught initially.
This is the grip favored by most PGA pros, including Tiger Woods, Dustin Johnson, Rory McIlroy, Justin Thomas, and many others.
It involves placing your right hand below your left hand and then running the index finger of the left hand down along the first 2 or 3 fingers of the right hand.
B. Cross-Handed Grip (Left Hand Low)
More and more putters are opting for the left-hand-low putting grip.
As its name implies, in this grip the left hand is placed below the right hand.
This method restricts a potentially overactive right hand from being too dominant in the stroke and can serve to limit the amount of face rotation.
It also tends to position the shoulders so that they’re more even and locks them in place more effectively.
As with the conventional grip, both thumbs should rest on top of the club.
Many great putters have adopted the cross-handed grip, including Jordan Spieth, Rickie Fowler, and Jim Furyk.
C. “Claw” Grip
This is a unique grip type, the main purpose of which is to eliminate the overuse of the right hand in the stroke, thereby almost eliminating all face rotation.
As with the conventional grip, the Claw places the left hand above the right hand, but unlike in the conventional style, the right hand sits on the side of the putter grip.
In this way, the left hand is responsible for most of the work, with the right hand offering a little bit of guidance for face control, but mostly just going along for the ride.
If you’re concerned about a right hand that gets too active in your stroke, the Claw would be a good method to try.
Some of the pros who have adopted the Claw include Phil Mickelson, Justin Rose, and Sergio Garcia.
D. Arm Lock Grip
There’s one other grip that’s much less popular but can be very effective for many golfers.
It involves running the shaft of the putter up along the forearm of the left arm.
This placement unifies the movement of the shaft with the movement of the lead arm, thereby eliminating a possible additional lever in the swing that could introduce inconsistencies.
Obviously, this grip works best if you have a putter with added length so that it can reach up to the forearm.
Two of the PGA pros who have gone to this grip method are Matt Kucher and Bryson DeChambeau.

3. Proper Stance
Stances are somewhat individualistic, but most good putters share similar characteristics in the way they stand to the ball:
1. The feet should be a little less than shoulder-width apart.
2. You should then have a forward bend of the upper body at the hips and a slight bend at the knees.
3. Your forward bend from the hips should place your eyes so that they’re looking directly down at the ball (slightly to the inside of the ball would be acceptable, but it’s never acceptable to have your eyeline outside the ball).
4. Your arms should hang freely so that your hands are directly below your shoulders.
5. Your shoulders, hips, knees, and feet should be parallel to your target line.
6. The ball should be positioned so that it’s approximately below your left eye. Farther back in the stance than that could potentially result in your stroke having a downward angle of approach to the ball, which could make the ball hop and skid immediately after impact.
7. In terms of the putter shaft itself, you should ensure that it’s at a fairly neutral angle when you’re at address. It shouldn’t lean either way; not with a forward lean which would deloft the clubface, nor with a backward lean which would add loft to the face. A neutral shaft angle delivers the putter to the ball at its intended loft.
8. One of the often-overlooked stance characteristics that most great putters have in common is that, when viewed from behind (down the line), the putter shaft and the forearms are in alignment. In other words, you could draw a straight line from the forearm down through the entire length of the shaft. This alignment is one of the key factors that enable you to minimize the face rotation of the putter.
4. The Putting Motion
When first learning how to putt in golf, amateurs are often taught that their putting stroke should be longer on the through-swing than it was on the backswing.
The theory behind this concept is that this asymmetrical stroke will ensure that putter head doesn’t decelerate into impact.
In short, this is not good advice for the average amateur golfer.
Taking a short back stroke and a longer through stroke makes it very difficult to gauge how much pace is needed on the putt which can, therefore, impair your ability to manage your distances properly.
And since poor distance control is one of the biggest deficiencies that amateurs struggle with, adopting a type of putting motion that can exacerbate this problem isn’t a good idea.
A much better approach to the putting motion is to have the length of your stroke about the same going back as it is going through.
Making this more symmetrical, rhythmic, pendulum-like stroke enables you to have a more consistent pace through the ball, which enhances your ability to “feel” how much effort is needed on the stroke to hit the ball a specific distance.

5. Face Angle at Impact
The ability to deliver a square putter face at impact is absolutely one of the most crucial aspects of good putting, particularly on short putts.
It has been scientifically proven that the angle of the face at the point when contact with the ball is made has FAR more of an impact on the starting line of the putt than the path of the stroke does.
In fact, studies have shown that face angle accounts for about 85% of the starting direction of the golf ball (assuming a strike in the center of the putter face).
Consider this:
A putter face that’s just 1 degree open or closed at impact will miss the hole from 7 feet!
That fact should impress upon you just how vital controlling the face angle is to putting success.
A good way to determine whether or not your face angle is square to your target line when you putt is to experiment on the practice green using a golf ball with a straight line drawn on it.
Position the ball so that the line is aimed directly at your target and then stroke the putt.
If the line rolls purely, end over end, with no wobble, you can conclude that your face angle was square at impact.
But if the line wobbles during its route to the hole, that’s an indication that you struck the ball with some amount of sidespin due to an open or closed putter face.
Continue to practice squaring the face at impact until you can consistently get the line on the ball rolling end over end.
There’s another easy drill that you can try to improve face angle control.
This one can even be done right in your home on the carpet. It’s called “Roll the Battery.”
Roll the Battery Drill
One way to determine if your putter face is square at impact is to putt using a D-Battery instead of a golf ball.
Place the battery horizontally on your floor or carpet and strike it as you would a ball.
The objective is to have the battery roll smoothly straight toward your target.
If both the heel and toe of your putter strike the battery simultaneously, it’ll roll straight and true, proving that your putter face was square.
If, however, the toe end of the putter hits the battery first, it’ll roll offline in a counterclockwise direction.
This will indicate that your putter face was slightly closed, which usually causes putts to be missed to the left.
Conversely, if the heel end strikes the battery first, it’ll roll offline in a clockwise direction.
Heel-first contact would indicate a face angle that was slightly open, which usually results in missing putts to the right.
6. Distance Control
As previously mentioned, more 3-putts by high handicap amateurs are caused by poor distance control than by any other factor.
If you have a putt from outside of 30 feet, for example, and leave your putt 10 feet short (or 10 feet long), studies have shown that the chances of making your next putt are remote.
Do this a number of times during the round and you’ll have sacrificed a handful of strokes that could easily have been saved.
The key to improving your distance control is to spend some time on the practice putting green working on managing your speed on longer putts.
There’s an effective practice drill that you can use to help you get better at doing this. It’s called the Leap Frog drill.
The Leap Frog Drill
Put a tee in the ground about 10 feet away.
Make your first putt, attempting to roll the ball just barely past the tee. Then make a second putt, the aim of which is to go just past where your first putt ended up.
Continue doing this, with each successive putt “leap frogging” the previous one.
The goal is to see how many balls you can hit before the final ball reaches the far edge of the green.
And you can add a little pressure to the drill.
If any putt doesn’t leap-frog the previous one, start all over from the beginning and see how far you can go.
This drill helps you get a feel for distance, by judging how much force you need to exert in your putting motion to produce a desired distance.
Conclusion
As we mentioned, putting plays an oversized role in the game, with over 40% of all strokes in a round taking place on the greens.
With the right outlook, though, you can definitely view that as a big opportunity to lower your scores.
With some knowledge of the proper putting fundamentals and a commitment to spending a little time on the practice green, you can easily knock several strokes off your scorecard.
In this way, putting is really “low hanging fruit.”
Anyone can learn how to putt in golf.
You can improve much more quickly and easily in this part of the game than you can in any other area.
Too many 3-putts? Too many missed short putts?
Work on the fundamentals and the drills that we laid out and they’ll become a thing of the past.
